Katoomba to Kanangra
A classic 3-4 day hike through the heart of the southern Blue Mountains
Led by Ashley Burke
Katoomba to Kanangra A classic 3-4 day hike through the heart of the southern Blue Mountains
Led by Ashley Burke |
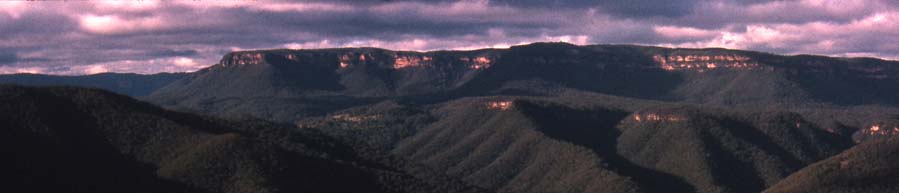
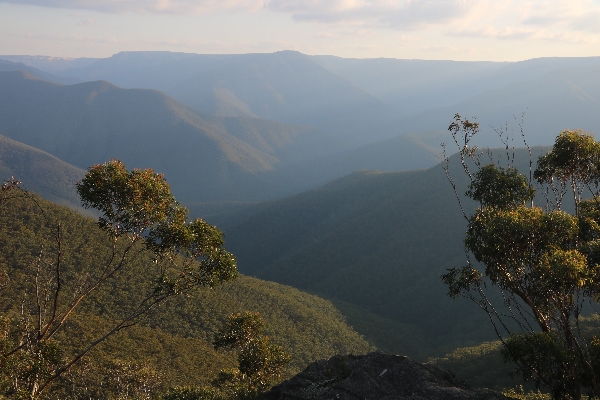
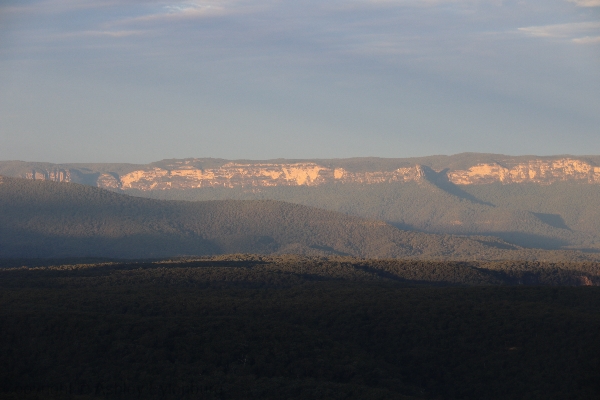
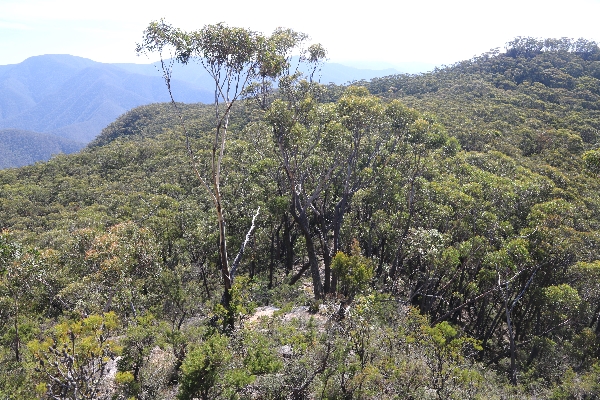
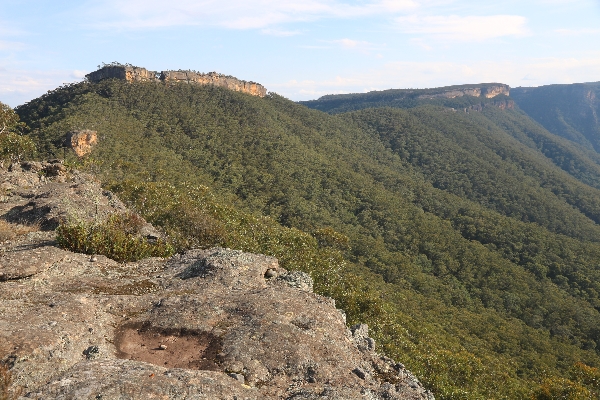
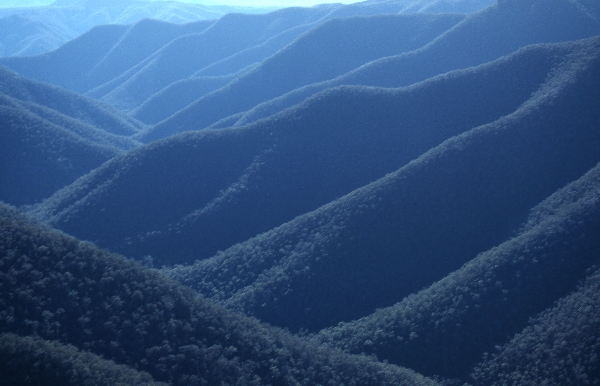
View towards Katoomba from Kanangra Walls, showing the Gangerang Range along which the route travels
About the Kanangra to Katoomba (or Katoomba to Kanangra) Walk
About the Kanangra to Katoomba (or Katoomba to Kanangra) Walk
Usually referred to "Kanangra to Katoomba" or K2K, this is a classic walk in the southern Blue Mountains. The walk includes the spectacular Kanangra Walls, the Gangerang Range, the Coxs River valley, the Wild Dog Mountains and the Narrow Neck plateau. These represent some of the iconic and best known landscapes in the southern Blue Mountains.
Although the route can be done by an extremely fit trail runner in 12-15 hours, most bushwalking groups attempt the walk over a somewhat more pedestrian 3 or 4 days. By allowing this amount of time you can enjoy the spectacular scenery, make side trips to points of interest such as Splendour Rock, and enjoy a couple of nights camping away from it all.
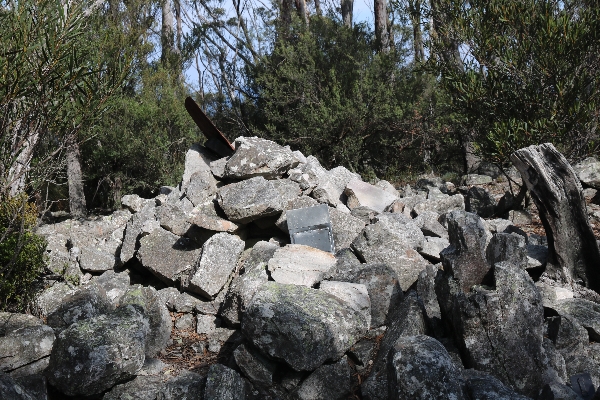
The hike incorporates the summit of Mt Cloudmaker, one of the famous Blue Mountains Three Peaks, and most walkers passing over this summit would sign the logbook there.
The total distance of the walk is 52km, with a total of 3044m of ascent and 2991m of descent over the 3-4 days!
Would you like to do this hike with an experienced guide? Join one of my informally yet professionally led and well organised expeditions in one of the most spectacular wilderness areas in New South Wales. I have had more than 30 years experience of bushwalking along this route and would welcome you on this trip. My trips allow you the autonomy of bringing your own gear and food, whilst providing you full guiding services, navigation, knowledge of the route and area, and organisation of all the logistics. Join a group of like minded people to hike this iconic route with the reassurance of it being led by an experienced guide.
Being a point to point walk, one of the logistical challenges is arranging transport to or from Kanangra Walls. Kanangra Walls is at the terminus of the Kanangra Walls road, about 1 hour and 40 minutes' drive from Katoomba. There is no public transport to or from Kananga Walls so private transport needs to be arranged for pickup from or dropoff at Kanangra Walls. This will be arranged by me as part of my service to you. A chartered minibus will be waiting for us at Kanangra and will take us back to Katoomba. The cost of this is included in the fee for the trip.
Although the walk can be done in either direction, I run the trip in the direction of Katoomba to Kanangra, organise vehicles to be waiting for us at Kanangra Walls so that when we finish the walk at Kanangra, we have immediate access to private transport back to Katoomba, via, of course, the Hampton Half Way House hotel for a well earned refreshment on the way home!
![]()
 |
My first venture along parts of the Katoomba to Kanangra walk was a day hike from Kanangra Walls to Mt Cloudmaker in 1982. In 1984 I walked the section from the Coxs River to Kanangra Walls and by 1985 I had completed the remaining section between Katoomba and the Coxs River. My first complete walk of the entire route in one go was in 1986. Since then I have done countless trips along the Kanangra to Katoomba route and have explored the surrounding country extensively. Today there would scarcely be a peak, ridge, spur or valley visible from any vantage point along the entire route that I have not personally been to. I have been leading bushwalks in the Blue Mountains for around 35 years, initially through a bushwalking club and later through my business MountainSphere Adventures. In my mid-teens I had the privilege of being introduced to this area by people who inspire me, and through my guiding services I hope to awaken the same spirit in others that was awoken in me so many years ago. I do this by more than just taking people on organised bushwalks. I aim to pass on my skills and knowledge using a practical and inclusive teaching style. I teach the empowering skill of bush navigation through my regular navigation training weekends and am happy to provide follow up training on my guided bushwalks including the Katoomba to Kanangra hike. My aim is not to simply take you on a bushwalk or to perpetuate your dependency on having a guide. Rather, by offering trips like the Katoomba to Kanangra walk, I hope to provide you the security of knowing you are safely led by an experienced guide, whilst at the same time passing on to you the skills that will enable you to gain the confidence to become independent and self reliant in the future. I want to provide you a pathway that will help you regard the bush as your home, the place you go for solace, to get away from it all, and to learn self reliance and confidence. You will do this in a friendly environment, in the company of like-minded people who are here for all the same reasons you are, in a spirit of mutual respect and friendship. Ashley Burke |
The trip itinerary allows 4 days, though this makes Days 2 and 3 rather short and in theory these could be combined. These two days do however, entail very long descents and ascents and breaking these into two days allows plenty of time to rest and to enjoy the tranquil Coxs River Valley on the afternoon of Day 2.
Most of the walk is on well trodden walking trails, although in places the trail is faint and difficult to follow, and in a couple of places good navigation or good prior knowledge of the area is required.
The 2019-2020 bushfires significantly affected the area and since the fires much of the track has become overgrown, and the path is indistinct and difficult to follow. Good navigation and prior knowledge of the route is therefore essential.
It is recommended that clients book accommodation in Katoomba for the night prior and night after the trip, though if you live in Sydney it is possible to drive up very early on the day the walk starts and drive home late on the last day.
Here is a day-by-day itinerary for the guided hike:
| Day | Total Distance | Total Ascent | Total Descent | Itinerary | Campsite or Accommodation |
| Night Before Departure | It is recommended that you book your own accommodation in Katoomba for the night prior to departure. | Own Arrangements | |||
| Day 1 | 20.0km | 634m | 735m | The first day is the longest in distance of the entire walk. Early in the morning (around 6:30am) you will be picked up from your accommodation in Katoomba and driven to the start of the Narrow Neck plateau from where the walk will commence. We walk out along the Narrow Neck plateau along a fire trail, a distance of 10km. At the end of the plateau you descend Tarros Ladders, a series of metal spikes down the cliff face! Care needed! From here we descend on a well trodden walking trail to Medlow Gap, and thence continue around the Wild Dog Mountains staying on the well trodden trail until we reach Mobbs Swamp. Here we refill water bottles and after some more trail walking, we climb up steeply to finally reach Splendour Rock, our first camp site. Splendour Rock is a truly spectacular place, a prominent rock outcrop from where panoramic views of the southern Blue Mountains can be beheld. We camp among the trees a little way back from the exposed rock itself. | Splendour Rock |
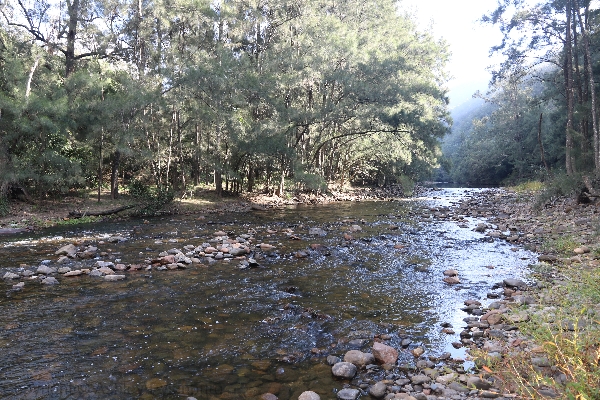
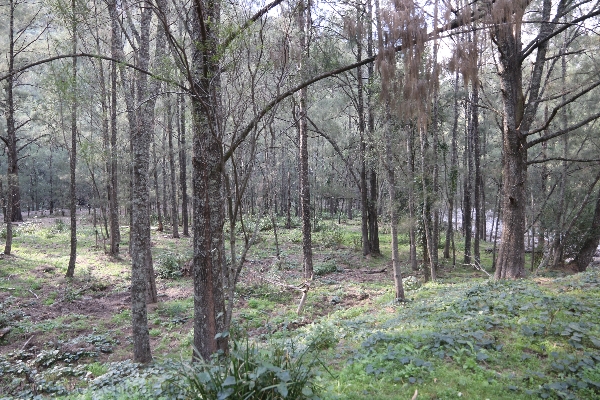
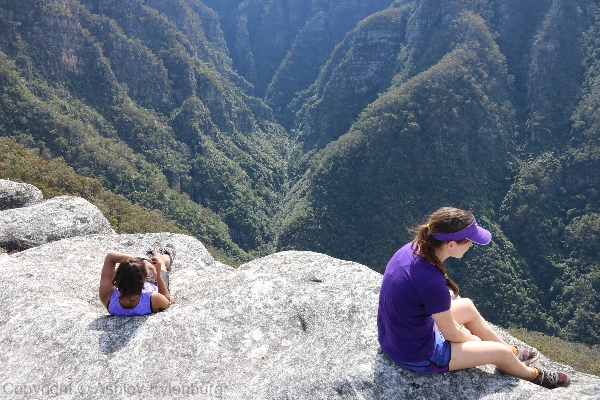
| Day 2 | 7.2km | 137m | 875m | Enjoy the sunrise from Splendour Rock. After breakfast we continue the walk. Descend from Splendour Rock and continue along the Wild Dog Mountains walking track to reach Mt Yellow Dog. From here it is a long descent to the Coxs River. Take a welcome break here, it is the one and only river encountered on the route. A short walk upstream is our campsite in a lovely peaceful river flat among casuarina trees. Take the afternoon off and have a swim in the river, and for those interested, learn some navigation skills similar to those taught on my navigation training weekends. | Coxs River |
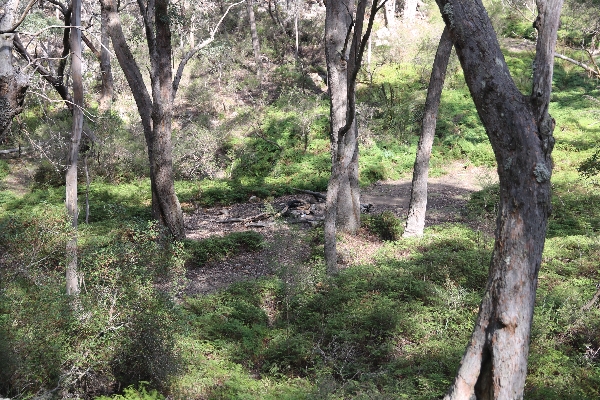
| Day 3 | 7.5km | 970m | 145m | Today is a day of sustained climbing. Directly across from our campsite is the base of the long spur up Mt Strongleg. This long climb brings you to Mt Strongleg, from where it is still quite a long walk on a stony path that is faint in places to reach the Gangerang Plateau and some beautiful views. You now walk through sub-alpine scrub, heath and forest to finally reach Dex Creek, the high headwaters of a small creek fed by a pristine hanging swamp. This is where we will make our final camp. | Dex Creek |
| Day 4 | 13.2km | 851m | 855m | From Dex Creek it is about 45 minutes' walk on a gently rising trail to reach the summit of Mt Cloudmaker, one of the Blue Mountains Three Peaks with its cairn and logbook. After signing the logbook we follow the Gangerang Range, a very mountainous trail with lots of ups and downs over several peaks including Mt Stormbreaker, Mt High And Mighty and Mt Berry. We traverse around the base of Crafts Wall on a difficult trail. At last we reach the Kilpatrick Causway and climb up steeply onto Kanangra Walls. This last hour of walking along Kanangra Walls is one of the most spectacular and beautiful sections of hiking trail anywhere in Australia and must be savoured as a privilege to remember. The end of the walk isn't far away, and as soon as we leave the majestic Kanangra Walls, we arrive at the Kanangra Walls Car Park and your waiting transport. We then drive back to Katoomba via the Hampton Half Way House, a well known watering hole. The trip concludes upon reaching Katoomba, whereupon you can travel home by your own arrangements or spend another night in Katoomba. | Own Arrangements |
| Total | 52.0km | 3044m | 2991m |
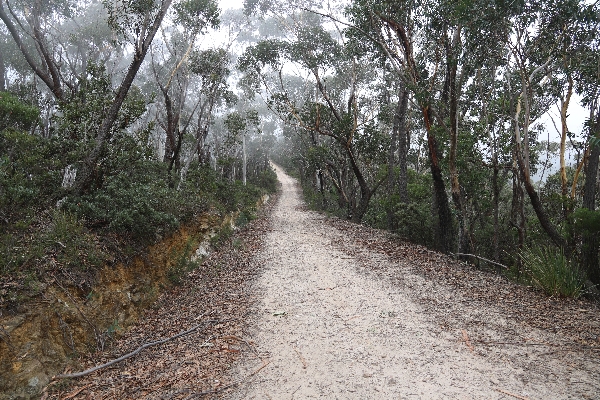
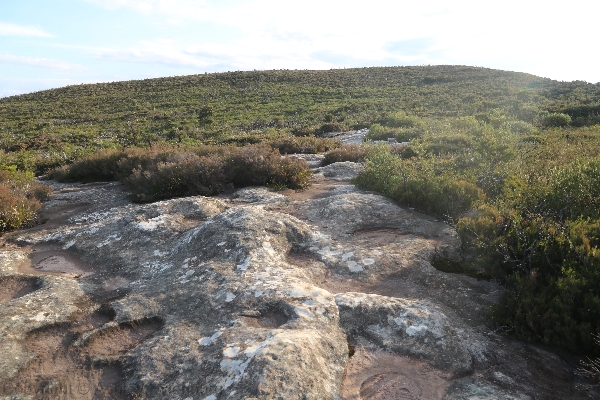
The Narrow Neck Plateau. We follow the fire trail along the top of this plateau on Day 1
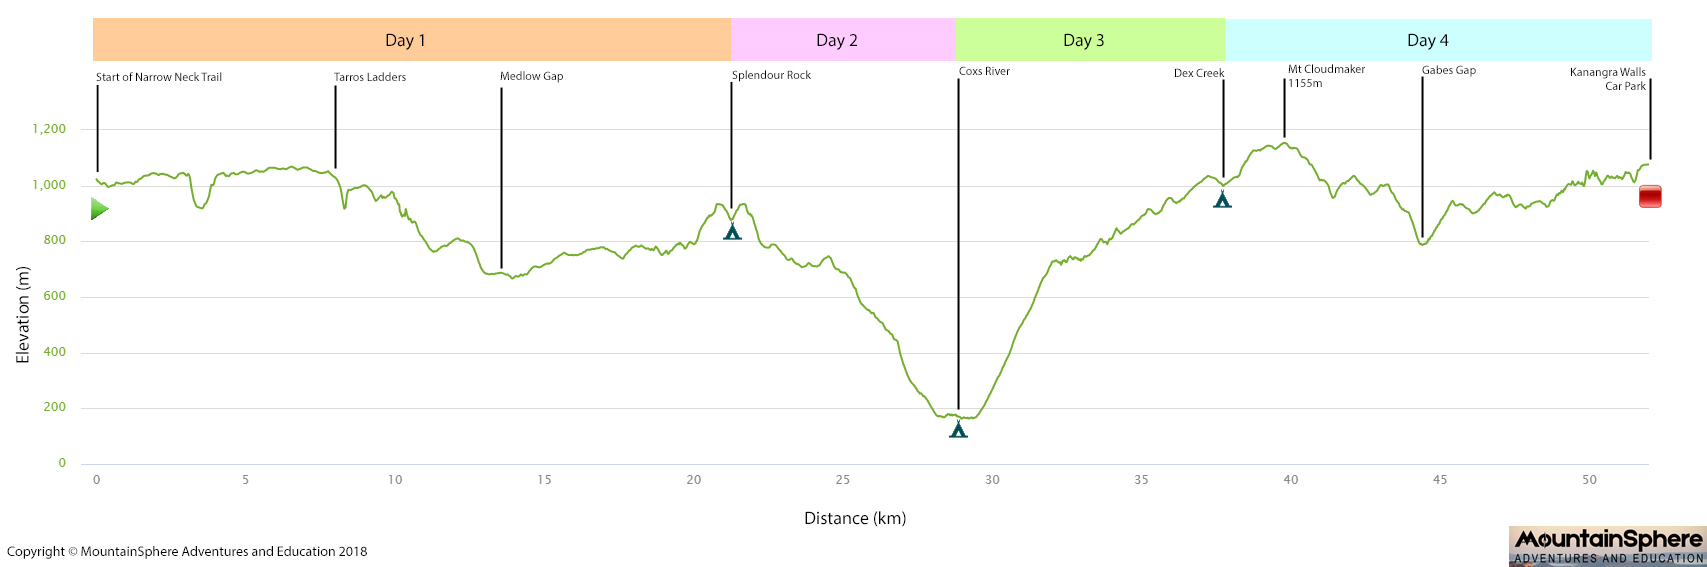
This elevation chart below gives you a good idea of the amount of climbing and descending day by day on this walk. As you can see, there are a lot of ups and downs!
Being a self-supported bushwalk, the idea is that everyone brings their own gear and food for the weekend. Click the button below to review the gear list for this trip.
![]()
If you don’t have some of the items on this list, I have a limited supply of gear that I can lend you, or alternatively some items such as tents and cooking equipment can be shared.
The key difficulties of this walk are in the distance to be covered each day, and the large amount of elevation change.
The total distance of the walk is 52km, with 3044m of ascent and 2991m of descent over the course of the 3-4 days.
Whilst most of the walking is along a well defined walking path, both the first day and the last day are rather long (20km and 13km respectively) with lots of ups and downs. The middle two days are both shorter and these two days can be combined into one longer day if desired. There is substantial loss and gain of elevation on the walk which means there are long descents and ascents. The highest point on the walk is Mt Cloudmaker at 1155m, and the lowest point is the Coxs River at just 150m. That is a 1000m range in elevation, and there are countless ups and downs during the course of the 3-4 days to add more to the amount of climbing and descending that you need to do! Expect long knee crushing descents and seemingly endless quad screaming climbs, especially on Day 3!
The track is often rough, stony and hard to follow with many dips, turns and obstacles. On the last day the knolls past Mt Cloudmaker (Rip, Rack, Roar and Rumble) are steep and stony and care must be taken on the trail there. Also on the last day the traverse around the base of Crafts Wall is rough, slow and hard on the ankles. This makes the last day a long and difficult day despite the distance being only 13.2km.
The 2019-2020 bushfires significantly affected the area and since the fires much of the track has become overgrown, and the path is indistinct and difficult to follow. Good navigation and prior knowledge of the route is therefore essential. You may also be walking through regrowth that is dense and head high in places.
The reward for all this effort is to transect a vast swathe of the southern Blue Mountains wilderness, taking in majestic mountain scenery in the process. It is strongly recommended that all participants undertake some form of fitness training for at least the 2 months prior to the trip. Ideal fitness preparation would be similar activities to what we'll actually be doing on this walk, namely bushwalking with a backpack and climbing up and down long hills. If it is not practicable for you to do training bushwalks prior to this trip then any form of long walk with as much hill climbing and descending as you can practicably manage would place you in good stead for this trip.
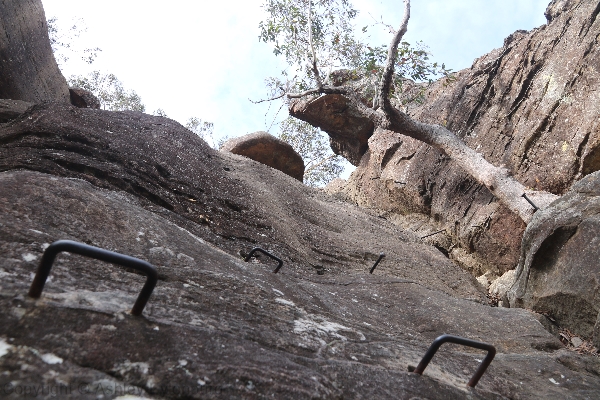
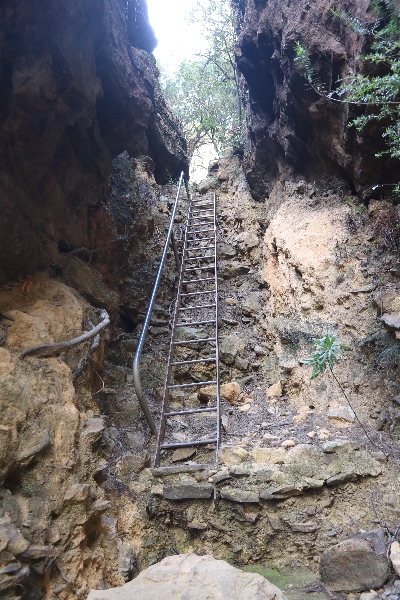
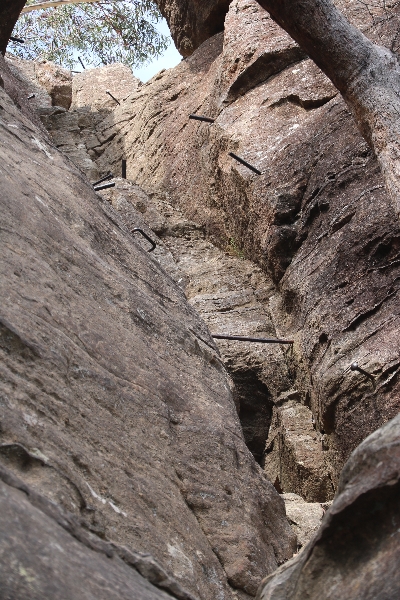
| Another challenge of this walk is the descent of Tarros Ladders, which is a cliff face with metal spikes in them which you use as handholds and footholds to descend. It is exposed and some people may feel insecure on a vertical rockface with no more than metal spikes to hold onto with hands and feet. Fortunately an alternative descent route called Duncan's Pass is nearby, and this route is available for anyone not wishing to descend on the metal spikes. |
Tarros Ladders |
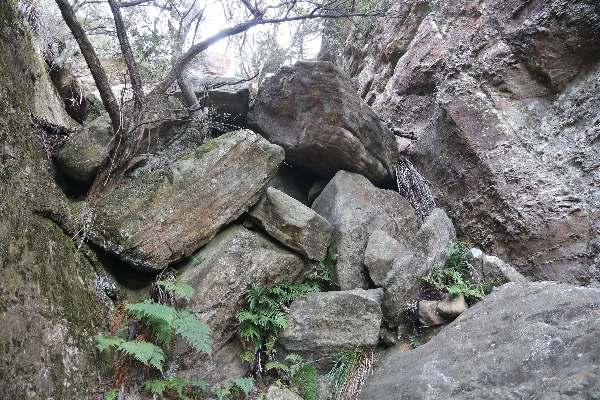
The walking trail is rough and faint in places. The path is often stony and awkward to walk on. You need to be careful to avoid slipping or straining an ankle on this uneven rough path. In a few places the path is very faint and you need to push your way through dense and stiff vegetation to finally reach our second night's campsite at Dex Creek.
In conclusion, you need to consider the following when assessing in your own mind the level of difficulty of the walk:
Please check the photos of the route and the detailed distance and elevation charts provided to you in your information pack when deciding if this trip is suitable for you.
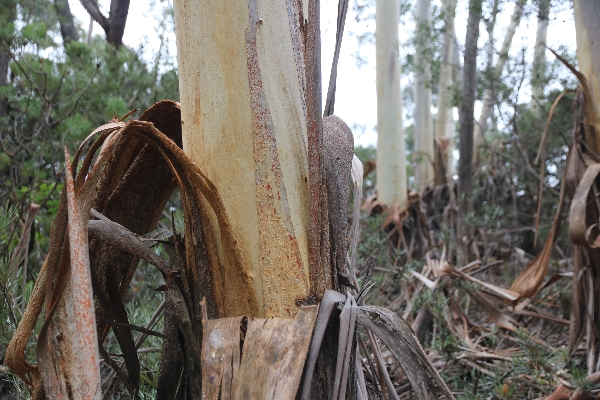
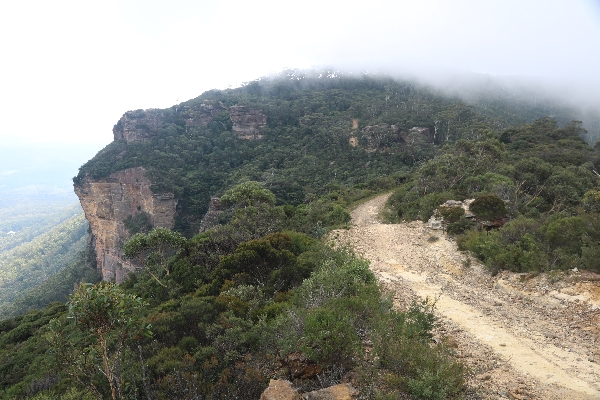
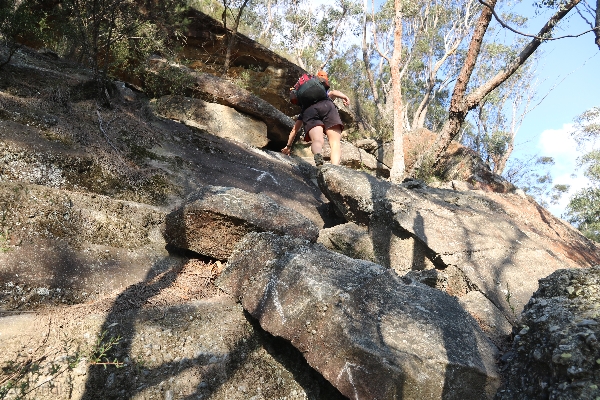
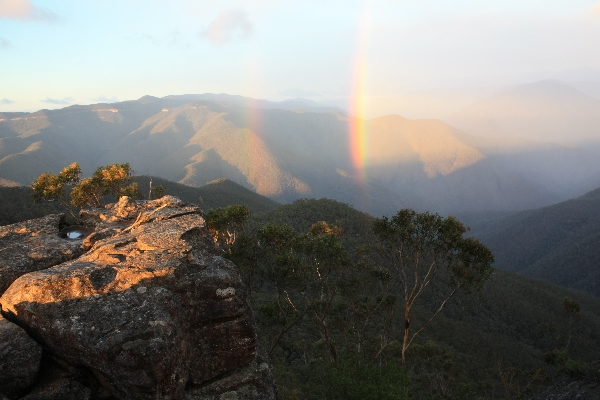
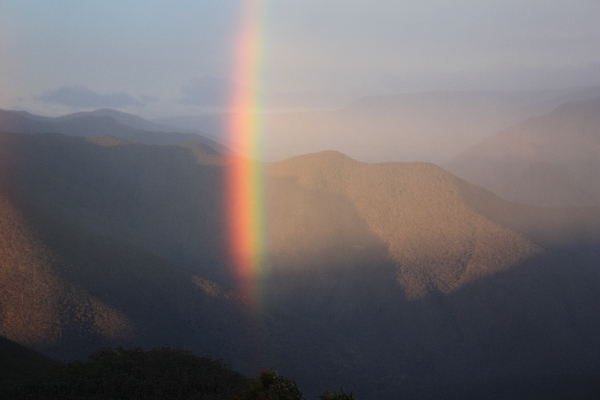
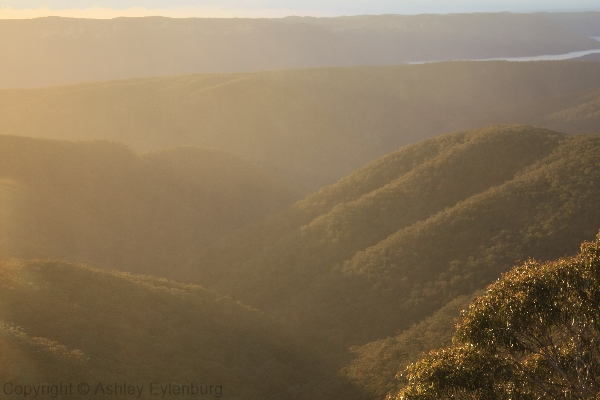
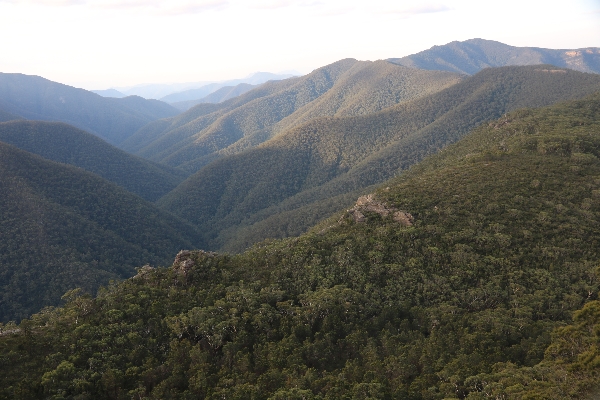
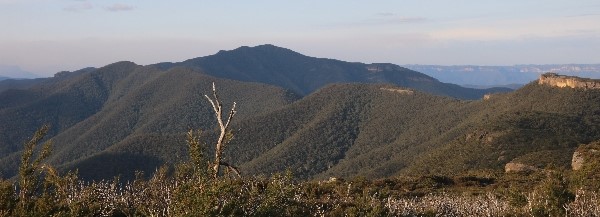
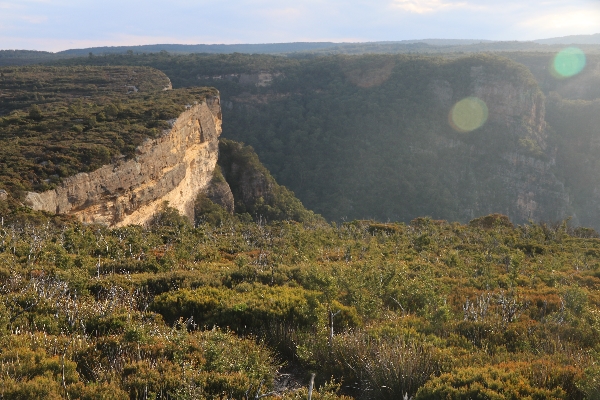
Here are a few photos of sections of the route. These have been selected to promote the spectacular natural beauty of the route as well as to highlight the challenges you may encounter on the way.
 |
|
 |
|
 |
|
 |
|
 |
|
 |
|
 |
|
 |
|
 |
|
 |
|
 |
|
 |
|
 |
Bring a swimming costume. Or alternatively, push on to Dex Creek, combining Days 2 and 3 into one. |
 |
Bring a swimming costume. Or alternatively, push on to Dex Creek, combining Days 2 and 3 into one. |
 |
|
 |
|
 |
|
 |
|
 |
|
 |
|
 |
|
 |
|
 |
|
 |
|
 |
|
 |
|
 |
The size of the group will be capped at 8 clients, and the trip will not proceed unless a minimum number of 5 clients sign up.
The cost of the trip is:
| 4 day trip (recommended) | $500 per person. |
| 3 day trip (only if all clients and the leader agree to 3 day option)* | $400 per person. |
*The trip will be done over 4 days as per the itinerary unless:
The cost includes:
The cost does not include:
![]()
When I receive your application, I will review it and then contact you. I will send you an invoice, you can make a deposit, and then your place on the trip is confirmed. You will then receive a full information pack containing everything you need to know to prepare for and attend the trip.
Katoomba to Kanangra hikes are currently scheduled for:
| 14-17 Sep 2018 | COMPLETED! |
| 8-11 Apr 2022 | THIS TRIP IS ALREADY FULL! Waitlist available. |
| 16-19 Sep 2022 | Sydney Sole Sisters only. Click here to apply. |
One of the rewards of running trips like the K2K is the people you meet on the way. Every trip brings new people with new perspectives and new friendships forged. My expeditions are always held in a spirit of friendship and respect between all participants. Below I share some of the feedback that they have kindly provided from past K2K trips and agreed to have published on this website.
"First of all a big shout out to our guide Ashley, although 'guide' is an understatement as he fulfilled so many additional roles: chef (wow that home baked banana cake ��), tea maker, sherpa, chauffeur, motivator, teacher, water finder, photographer, someone who made us feel safe and made sure I didn't fall off the bottom of Tarro's Ladder ��. Arranging all transport and car shuffles single-handedly, and meticulously detailed pre-trip information and arrangements, he had everything covered ☺️ Thanks again for all your efforts, although I'm sure I've missed a couple of things ��" - Amanda on Facebook after K2K September 2018 Amanda went on to write, "Ashley I think you have already taken some of my thoughts as a testimonial, however I hope you don't mind if I use this space to add some thoughts to questions that had no room for additional thoughts. I chose day 1 as my favourite day, however I really didn't have a favourite day, I enjoyed each day for what it was and what it gave me. At the time I said that day 2 was the hardest I had ever done; in retrospect I would be more than happy to do it all over again, so while I found it hard I don't think it rates as the hardest thing ever!! I answered that I would have preferred it to have been over 4 days instead of 3 - to be honest I was very happy with the hike as it was, and I certainly don't regret doing it over 3 days. If its offered as 3 days next year, I hope I can do it again. If it's offered over 4 days next year, that makes it a different experience that I hope I can be a part of :) I think you go out of your way to make sure everyone is comfortable and well taken care off, and well informed, and provided for. I think you are a great guide, and I think the effort you go to is over and above what most stand-alone guides would think of providing." |
"K2K is one of the best walks I have ever done. It is up there with the Overland Track in Tasmania and the Milford Track in New Zealand for beauty but more isolated and much harder. I did not realise how beautiful and rugged some parts of the Blue Mountains could be and we walked through the heart of it all. I hope it remains a difficult and raw walking trail for self sufficient hikers. No chardonnay tour operators, signs or huts please." - Shane, K2K September 2018 |
"The trip was great - I have never hiked this part of the Blue Mountains and it proved spectacular! Ashley puts a lot of effort into the organisation of the trip and provides very professional information both prior and during the hike. Ashley is someone who is willing to share his knowledge, he does this quite naturally, without too much formality and with zero arrogance. The trip overall was not overly formal, pretty low key and provides an experience that allows you to challenge yourself whilst feeling safe. We did the 3 day option which i think suits someone who likes a physical challenge, the 4 day option would be good for some physical down time and allow more opportunity to stop and take it all in. I personally enjoy a trip that has some physical and mental challenges, so the difficulties faced from some of the elevations on this trip didn't bother me at all. Great trip - I thoroughly enjoyed the company and being in the wilderness. Looking forward to more!" - Sue, K2K September 2018 |
"The K2K guided walk was fantastic! Ashley is a great guide and fully supported us all during the walk. I would highly recommend his walks and training to anyone and will be looking forward to the next adventure." - Ann, K2K September 2018 |
Web page created 28 Apr 2018, last updated 21 Dec 2021. All content copyright © Ashley Burke 2018. Not to be copied, duplicated or used for any purpose without permission. |