Navigation Tutorial
Lesson 3 - Additional Techniques
All content copyright © Ashley Burke 2008. Not to be copied, duplicated or used for any purpose without permission.
Navigation Tutorial Lesson 3 - Additional Techniques
All content copyright © Ashley Burke 2008. Not to be copied, duplicated or used for any purpose without permission. |
Navigation course by Ashley Burke
9. Identifying the features around you
Imagine that you have been walking through the bush for a while, and then you reach a prominent place with expansive views of the surrounding area. From here you see peaks and ranges that you have not seen before. It would be a good idea at this point to identify what these peaks and ranges are on the map. Often you will do this just for interest. But doing this is also a very important navigation tool. Identify features around you when you know your location, so that later on, if you are unsure of your location, you can reverse the logic to work out your location from that feature.
In this section we assume that you know your current location. We assume that you can see a hill that is several kilometres away, and you are unsure what it is on the map. You will now use your map and compass to work out what that feature is.
9.1 Step 1 - Mark your current location on the map
With a pencil, mark a dot or a cross on the map that represents your current location. Remember: we are using this technique when we know where we are. We will use it to identify a distant object.
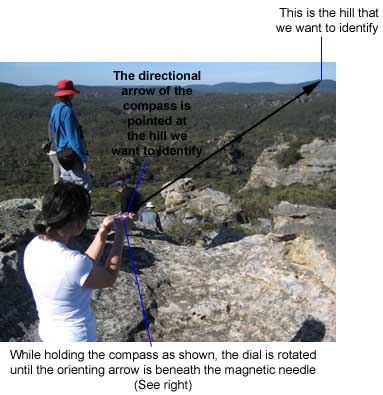
9.2 Step 2 - Get the magnetic bearing of the feature from your location
We need to get the magnetic bearing of the straight line between you and the feature that you want to identify. Do this:
Figure 9.1 shows a navigator in the process of carrying out this technique.
 |
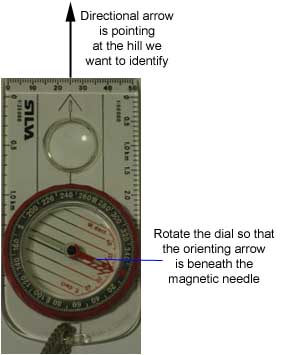 |
Fig 9.1
9.3 Step 3 - Add the grid to magnetic angle
Does your compass have an adjustable declination correction scale or an arrow that can be adjusted to set the declination? If so, you can skip this step. Instead, read the note about compasses with a declination scale in Appendix A.
When Step 2 is done we have a magnetic bearing from our current location to the feature we are trying to identify. Before we can use the map we need to convert this to a grid bearing. To do this, we add the grid to magnetic angle. That is, we rotate the compass dial anticlockwise by 12°.
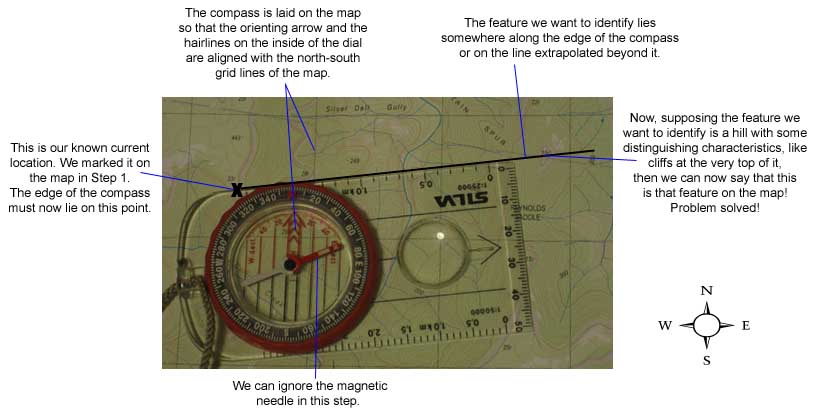
9.4 Step 4 - Line up the compass on the map
Now we place the compass on the map in such a way that ALL of the following are simultaneously true:
See Figure 9.2 for an example showing the compass correctly positioned on the map.
9.5 Step 5 - Rule a line and deduce the identity of the feature
Without moving the compass after correctly positioning it in Step 4, rule a line along the edge of the compass that intersects your known location. Now you can take the compass away from the map if you wish.
The feature that you want to identify lies somewhere along this line. You should now be able to identify the feature by studying the map along the ruled line. Make an estimate of how far away from you the feature is, and look on the region of the map that is that distance along your ruled line. Study the map contours and correlate these with what you see as you look in the country between you and the feature that you want to identify. You should now be able to identify it on the map. See Figure 9.2 for an example.
Fig 9.2
You have now learned how to identify features around you when you know your location. You can reverse the logic to work out where you are if you recognise a landscape feature and can identify it on the map. In the next section you'll learn how to do this.
Web page created 12 Jul 2008, last updated 23 Dec 2014. All content copyright © Ashley Burke 2008. Not to be copied, duplicated or used for any purpose without permission. |